
Understanding Structural Problems Before It's Too Late
Many Westchester homeowners take pride in their properties, but few realize how vulnerable their homes can be to serious structural problems. With an average home age of 60+ years in many Westchester neighborhoods, combined with our region’s harsh freeze-thaw cycles and heavy snow loads, structural damage isn’t just a possibility—it’s a silent threat that could compromise your home’s safety and value.
The challenge? Most homeowners don’t know what to look for. You might notice a crack in your basement wall or a door that won’t close properly and dismiss it as normal settling. But what feels like a minor annoyance could be the first sign that your home needs structural repairs sooner rather than later. And the longer you wait, the more expensive those repairs become.
What Exactly Are Structural Problems?
Before we dive into the warning signs, let’s clarify what we mean by structural problems. Your home’s structure is the skeleton holding everything up—the foundation, beams, walls, and roof framing that bear the weight of your entire house. Structural problems are damage to these critical components that affect your home’s integrity, safety, and longevity.
This is different from cosmetic issues like peeling paint or worn shingles. A crack in drywall might just need spackle. But a crack running through your foundation? That’s structural, and it demands professional attention.
Why Early Detection Saves You Time and Money
Here’s what most Westchester homeowners learn the hard way: catching structural damage early can save you tens of thousands of dollars. A small foundation crack that costs $2,000 to repair today could become a $25,000 repair job in five years if left unchecked. Beyond the financial impact, structural problems pose real safety risks to your family—sagging floors can collapse, failing foundations can shift, and deteriorating support beams put everyone in the home at risk.
Early detection also protects your property value. If you’re planning to sell, a home inspection will uncover any structural issues. Buyers will either demand significant price reductions or walk away entirely. By addressing problems now, you’re investing in your home’s future.
What You’ll Learn in This Guide
In this guide, we’ll walk you through the most common warning signs that your Westchester home needs structural work. You’ll learn what to look for both inside and outside your home, understand why certain issues are more urgent than others, and discover when it’s time to call in a professional structural engineer. By the end, you’ll have the knowledge to spot potential problems before they become costly disasters.
Let’s get started.

Interior Warning Signs: What to Look for Inside Your Westchester Home
The telltale signs of structural problems often reveal themselves indoors first. Since your home’s structural system is constantly bearing weight and dealing with the stresses of seasonal changes—especially in Westchester’s freeze-thaw climate—interior damage is frequently where homeowners first notice something’s wrong. Here are the key warning signs to watch for.
Cracks in Walls and Ceilings: Identifying Serious Structural Damage
Not all cracks are created equal. Understanding the difference between a harmless cosmetic crack and a sign that you need structural repairs is critical.
Hairline Cracks vs. Structural Cracks
Hairline cracks—those thin, spider-web-like lines less than 1/8 inch wide—often appear in new drywall or plaster as homes settle naturally. These are usually cosmetic and can be patched without concern. However, if you notice cracks that are:
- Wider than 1/4 inch and continuing to grow
- Horizontal or diagonal running across walls (especially at 45-degree angles)
- Recurring in the same location after you’ve patched them
- Following the mortar lines in brick or block walls
…these are red flags indicating structural movement.
Where to Look for Serious Cracks
Pay special attention to:
- Corners of windows and doors — These are stress points where your home’s frame is under the most pressure
- Where walls meet the ceiling — Sagging or cracks here suggest foundation settlement or beam failure
- Basement and crawlspace walls — Horizontal cracks in foundation walls are particularly concerning and often indicate hydrostatic pressure from soil or water
- Staircase walls — Cracks that follow stair stringers can signal foundation movement
Sagging or Uneven Floors: A Clear Sign of Structural Issues
One of the most telling indicators that your Westchester home needs structural work is a floor that sags, bounces, or feels uneven underfoot.
What Causes Floor Sagging?
Sagging floors typically result from:
- Beam failure or rotting — Wood beams that have absorbed moisture (common in Westchester’s humid climate) or been damaged by pests lose structural capacity
- Foundation settling — Uneven settling of the foundation causes floors to slope in one direction
- Inadequate support — Older Westchester homes sometimes lack sufficient posts or piers to support the weight above
- Water damage — Prolonged moisture exposure weakens floor joists and subfloors
When Sagging Is Serious vs. Normal
New homes settle slightly in the first 1-2 years. If your floor feels slightly soft in one spot but shows no other warning signs, it may just be normal settling. However, get a professional assessment if:
- The sag is noticeable to the naked eye
- You can feel a dip when walking across the room
- Water damage or mold is visible in the basement
- The floor is bouncy or feels unstable
- The sagging is getting worse over time
A floor sagging 1/2 inch or more over a 20-foot span warrants immediate structural evaluation.
Doors and Windows Sticking or Misaligned: Frame Shift Indicators
Here’s something many homeowners overlook: if your doors and windows suddenly start sticking, won’t close properly, or show visible gaps between the frame and wall, it could signal that your home’s frame is shifting due to structural problems.
Why This Matters
When a door or window frame is slightly out of square, it’s usually just a minor adjustment. But when multiple doors and windows throughout the house are sticking or won’t latch—especially if this is a new development—it indicates that:
- Your foundation may be settling unevenly
- Structural beams may be sagging or failing
- The overall house frame is shifting out of plumb (vertical alignment)
This is particularly common in older Westchester homes built on clay or sandy soil that shifts with seasonal moisture changes.
What to Check
Look for:
- Diagonal gaps between window frames and walls
- Doors that need to be lifted or forced to close
- Visible separation where walls meet window trim
- Multiple stuck doors in different areas of the house (not just one humidity-swollen door)
Basement and Crawlspace Signs: Early Warning System for Structural Failure
Your basement or crawlspace is ground zero for detecting structural problems. This is where water intrusion, foundation damage, and beam deterioration first become visible.
Bowing or Bulging Walls
Inward-bowing basement walls are a serious warning sign. This typically happens when:
- Soil pressure from outside the foundation increases
- Hydrostatic pressure from water buildup pushes inward
- The foundation was inadequately reinforced when built
Don’t ignore bowing walls. They indicate that your foundation is being pushed inward and may eventually crack or fail. This is one of the most common structural problems in Westchester homes, especially those built before modern foundation engineering standards.
Water Damage and Efflorescence
Look for:
- Standing water or dampness indicates drainage problems that compromise foundation integrity
- White powdery deposits (efflorescence) on foundation walls — A mineral deposit left behind when water passes through concrete, signaling moisture infiltration
- Rust stains on steel beams or columns — Corroding steel loses its load-bearing capacity
- Mold or mildew growth — Signals prolonged moisture exposure that weakens wood and concrete
- Soft or crumbling concrete — In Westchester’s harsh winters, freeze-thaw damage can deteriorate concrete significantly over time
Rotting Support Beams and Posts
Run your hand along wooden support beams and posts. If the wood:
- Feels soft or spongy
- Has visible rot, dark discoloration, or a musty smell
- Has termite damage (small holes or galleries)
- Yields to a screwdriver poke
…you likely need structural repairs needed in your basement. Rotted beams can no longer safely support your home’s weight, and replacement should be a priority.
Why Westchester Homes Are Vulnerable to Structural Damage
Westchester’s climate and the age of our housing stock create a perfect storm for structural problems. Many homes were built 50-80+ years ago, before modern building codes and foundation techniques. Combined with:
- Freeze-thaw cycles that expand and contract soil
- Heavy snow loads that stress roofing and structural supports
- Clay-based soil common to the region that shifts seasonally
- Age-related deterioration in wood framing and concrete
…it’s no wonder that structural issues are so prevalent in our area.
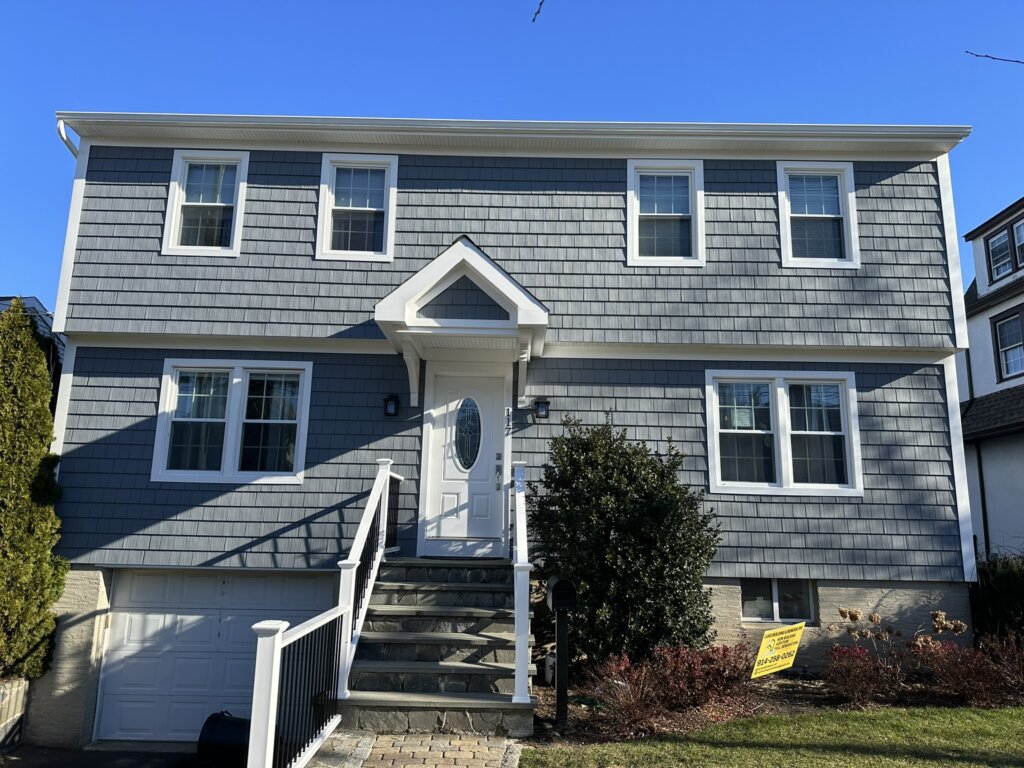
Exterior Warning Signs: How Your Home's Outside Reveals Structural Damage
While interior signs tell you there’s a problem, exterior warning signs often reveal where the problem originates. Your home’s exterior—the foundation, walls, roof, and chimney—bears the brunt of Westchester’s weather and is frequently the first place where structural problems begin. By the time you notice interior damage, exterior deterioration has likely been developing for months or even years.
Foundation Issues: The Root of Most Structural Damage
Your foundation is literally what your entire home rests upon. Any damage here is a red flag that you need structural repairs needed immediately.
Types of Foundation Cracks: Which Ones Are Serious?
Not all foundation cracks indicate structural failure, but knowing which ones do is critical.
Vertical Cracks
Vertical or slightly diagonal cracks (following the mortar lines in block or brick foundations) are common as homes settle and concrete cures. These are typically less urgent than other types. However, they still warrant monitoring, especially if they’re:
- Growing wider over time
- Wider than 1/2 inch
- Leaking water into your basement
Horizontal Cracks
These are the serious ones. Horizontal cracks running across your foundation wall indicate:
- Pressure from soil or water pushing inward on the foundation
- Structural failure of the foundation itself
- Potential collapse if left unaddressed
Horizontal cracks should be inspected by a structural engineer immediately. In Westchester, where heavy clay soil expands when wet and contracts when dry, horizontal foundation cracks are surprisingly common—especially on the side of the house that receives the most water drainage or faces north (where soil stays wetter longer).
Stair-Step Cracks in Brick or Block
Cracks that follow a stair-step pattern through the mortar joints indicate foundation movement and settlement. They’re often seen in older Westchester homes built on inadequate foundations or in areas with poor drainage.
Settlement Gaps: The House Is Pulling Away
One of the most alarming exterior signs is a visible gap between your home’s foundation and the house structure above it. This indicates that the foundation has settled unevenly, causing the house to literally shift and separate from its base.
What This Means:
- Uneven settlement is pulling different parts of your foundation down at different rates
- This creates stress throughout your entire structural system
- If severe enough, it can eventually cause the house to collapse in that area
- It almost always requires professional underpinning or other foundation repairs
If you can slip a quarter into the gap between your foundation and house frame, it’s time to call a structural engineer.
Roof Deterioration: More Than Just a Leaky Ceiling
While roof damage is often thought of as a roofing problem, severe deterioration can actually indicate—or cause—structural issues with the framing beneath.
Sagging Roofline: A Sign of Beam Failure
Walk around the perimeter of your Westchester home and look at the roofline from a distance. The edge should be straight and level. If you notice:
- A visible sag or dip in the middle of the roof
- The roofline droops toward the center
- Gutters that appear to sag along with the roof
…this indicates that the rafters or support beams underneath are failing and no longer supporting the roof’s weight properly. This is a serious structural concern that demands immediate professional attention.
A sagging roof can collapse under the weight of Westchester’s heavy snow loads, especially after a heavy winter storm.
Missing, Curling, or Deteriorating Shingles
While missing or damaged shingles are primarily roofing issues, they accelerate structural damage by allowing water to penetrate the roof framing. Over time, this leads to:
- Rotting roof decking
- Weakened rafters and trusses
- Structural failure of the roof system
- Water damage cascading down into the attic, walls, and living spaces
If your roof is showing significant age or damage, addressing it quickly prevents it from becoming a structural problem later.
Exterior Wall Problems: Bowing, Bulging, and Separation
Just as bowing basement walls indicate foundation failure, bowing exterior walls signal serious structural issues.
Bowing or Bulging Exterior Walls
If you notice that:
- An exterior wall appears to bow outward
- The wall bulges at the center
- Siding doesn’t sit flush against the framing
- Windows or doors that run along the bowed section show gaps or misalignment
…your wall framing is under stress and failing. This can be caused by:
- Foundation settlement is pushing the wall outward
- Inadequate interior bracing or support
- The roof load is pressing down unevenly
- Water damage is weakening the framing
Bowing walls won’t correct themselves and will only worsen over time. Professional evaluation is essential.
Separation Between House and Chimney
This is a specific but important warning sign. If your exterior chimney is visibly pulling away from the house—creating a gap you can see or fit a credit card into—it indicates foundation movement. The chimney settles at a different rate from the main structure, revealing uneven foundation settlement.
This is particularly common in Westchester homes built on clay soil in areas with poor drainage.
Chimney Leaning, Deteriorating, or Tilting: Don’t Ignore This
Your chimney is its own structure, bearing weight from the roof and flue gases from your heating system. Chimney problems are often structural problems waiting to happen.
Visible Lean or Tilt
Stand back from your home and look at your chimney against the vertical line of your house. Does it appear to lean away from the house or tilt to one side? A leaning chimney indicates:
- Foundation settlement beneath the chimney base
- Deterioration of the chimney’s mortar and bricks
- Wind or impact damage over time
A leaning chimney can eventually separate from the house, fall, or collapse—especially during high winds or heavy storms.
Deteriorating Mortar and Bricks
Examine the mortar joints and brick surface of your chimney. Look for:
- Crumbling or missing mortar between bricks—Westchester’s freeze-thaw cycles are particularly damaging to chimney mortar
- Spalling bricks (chips or pieces missing from the brick face)—Water freezes inside the brick pores, expanding and breaking the surface
- White powder or staining on the chimney indicates moisture damage
- Visible cracks through bricks or mortar joints
In Westchester’s harsh climate, chimneys take a beating. Deteriorated mortar and bricks allow water infiltration, which weakens the entire chimney structure and can eventually lead to failure.
Why Chimney Deterioration Matters Structurally
A deteriorating chimney isn’t just an aesthetic problem. It:
- Can separate from the house during storms or earthquakes
- May collapse inward, potentially damaging the roof or upper floors
- Allows water to infiltrate your home, damaging framing and structural components
- Creates a fire hazard if the flue becomes compromised
Exterior Siding and Trim: Signs of Water Damage and Structural Stress
Don’t overlook what your home’s exterior surface is telling you.
Rotting or Soft Siding
If you press on your wood siding and it feels soft, spongy, or yields to pressure, water damage has compromised the structural sheathing beneath. This weakens the wall assembly and allows additional water infiltration.
Gaps Between Siding and Trim
Gaps that develop between siding, trim, windows, and doors often indicate:
- Foundation settling is causing the house frame to shift
- Structural movement from seasonal changes
- Water damage is weakening the framing
Rust Stains or Water Streaks
Vertical rust stains or water streaks running down siding indicate:
- Corroding metal flashing or fasteners
- Water running down the exterior wall
- Potential foundation or drainage problems
These stains tell you where water is traveling—often pointing to roof leaks, gutter issues, or foundation water intrusion.
Why Westchester’s Climate Creates Unique Exterior Structural Risks
Westchester’s weather is uniquely tough on home exteriors and the structures beneath them:
- Freeze-thaw cycles expand and contract soil, shifting foundations and causing cracks to grow
- Heavy snow loads (averaging 20-40 inches per winter) stress roof systems and can cause sagging or collapse
- Spring thaws create hydrostatic pressure around foundations, pushing inward on basement walls
- High humidity in summer accelerates wood rot and brick deterioration
- Ice dams in winter trap water against roofs and in gutters, forcing water into the attic and wall spaces
All of these create the perfect conditions for structural problems to develop and accelerate.

Climate-Specific Factors: Why Westchester Homes Are Uniquely Vulnerable to Structural Damage
Understanding the warning signs of structural problems is important. But to truly protect your Westchester home, you need to understand why structural damage is so prevalent in our region. The answer lies in the unique combination of climate, soil, and housing age that defines Westchester County. These factors create a perfect storm for structural deterioration—and they’re largely outside your control as a homeowner.
Freeze-Thaw Cycle Damage: Westchester’s Silent Structural Killer
Westchester’s most destructive force isn’t dramatic wind or earthquakes. It’s the endless cycle of freezing and thawing that occurs throughout our long winters and spring months.
How Freeze-Thaw Cycles Damage Your Foundation
Here’s the science: When temperatures hover around freezing, water in soil and concrete repeatedly freezes and thaws. Each cycle:
- Water freezes, expanding about 9% in volume
- This expansion puts pressure on the surrounding soil and concrete
- The ice melts, leaving tiny gaps and voids
- More water fills those voids, and the cycle repeats
- Over months and years, this repetition causes catastrophic damage
The Damage Manifests As:
- Spalling concrete — Chips and pieces of your foundation break off as internal pressure builds
- Growing cracks — Small cracks widen as freeze-thaw cycles work like a hydraulic wedge
- Foundation heave — In some cases, the foundation actually gets pushed upward by expanding soil
- Basement wall bowing — The repeated pressure can push basement walls inward
- Chimney and masonry deterioration — Bricks and mortar are especially vulnerable; water penetrates tiny pores in the brick, freezes, expands, and shatters the material
Westchester typically experiences 30-50 freeze-thaw cycles per winter season. That’s 30-50 opportunities each year for your foundation, chimney, and masonry to be damaged.
Why This Matters for Your Structural Repairs
Many homeowners patch foundation cracks or chimney mortar, only to see the damage return the following winter. Why? Because the underlying freeze-thaw problem isn’t being addressed. Simply filling a crack won’t stop the cycle that created it in the first place. This is why professional structural repairs in Westchester must account for freeze-thaw damage and often require specialized techniques—like epoxy injection for concrete cracks or lime mortar (instead of modern cement mortar) for brick chimneys, which is more flexible and allows for seasonal movement.
Regional Variation Within Westchester
Even within Westchester County, freeze-thaw damage varies:
- Northern areas (like Yonkers, New Rochelle) experience more severe freeze-thaw cycles due to higher elevation and colder temperatures
- Closer to the Hudson River (Tarrytown, Hastings), the moderating effect of the river slightly reduces the intensity of freeze-thaw cycles
- Southern areas (Rye, Port Chester) may see fewer extreme freeze-thaw cycles, but still experience significant damage
Where you live in Westchester affects how vulnerable your home is to freeze-thaw damage.
Heavy Snow Loads: The Weight That Breaks Roofs and Structures
Westchester’s winters are heavy—literally. The average Westchester winter brings 20-40 inches of snow, with some years exceeding 50 inches. Each inch of snow adds significant weight to your roof.
How Much Weight Are We Talking About?
- Fresh, wet snow weighs approximately 10-20 pounds per square foot
- Packed or icy snow can weigh 25-40+ pounds per square foot
- A typical residential roof might support 20-30 pounds per square foot of snow load before reaching capacity
This means:
- A single heavy snowfall can nearly saturate your roof’s load capacity
- Multiple snowfalls without melting between them can exceed safe limits
- In years with excessive snow, many Westchester roofs are operating at or beyond their design limits
The Structural Consequences:
- Sagging roofs — Rafters and trusses bend under the weight; in extreme cases, they permanently deform
- Roof collapse — Roofs occasionally collapse during or just after major snowstorms; this happened to several Westchester homes during the 2014-2015 winter
- Cracked ceilings and walls — The structural stress of heavy snow creates internal cracking as the house shifts under the load
- Damaged attic framing — Trusses can crack or bend, compromising the structural integrity of your entire upper floor
- Compromised support walls — The load travels down through walls to the foundation; inadequate support walls can buckle or bow
Why Older Westchester Homes Are At Higher Risk
Homes built before the 1980s were often designed with lower snow load capacities. Building codes have increased over the decades, but your 1950s-era Westchester home was likely designed for loads lower than what we regularly experience today. This makes older homes particularly vulnerable to snow load damage.
Winter Maintenance Matters
Professional roof snow removal might seem like an expense, but in Westchester, it’s often a structural necessity—particularly if:
- Your home was built before 1980
- Your roof is already showing age or deterioration
- You’ve had multiple heavy snowfalls in succession
- Your attic framing is visible and shows signs of stress or previous damage
Soil Composition: The Hidden Factor Affecting Your Foundation
Not all soil is created equal. Westchester’s soil composition creates unique challenges for foundations and structural stability.
Clay-Based Soil: The Westchester Standard
Much of Westchester sits on clay-rich soil—a legacy of glacial activity during the ice ages. Clay soil has properties that are problematic for homeowners:
High Expansion and Contraction:
- Clay absorbs water easily and swells significantly when wet
- It shrinks and hardens when dry
- This seasonal cycle moves your foundation, creating stress and cracks
- In wet springs and dry summers, your foundation literally shifts
Poor Drainage:
- Clay doesn’t drain water quickly
- Water accumulates around foundations after rain or snowmelt
- This hydrostatic pressure pushes against basement walls, causing bowing and cracking
- Poor drainage also accelerates freeze-thaw damage because water stays in contact with your foundation longer
Variable Bearing Capacity:
- Different properties have different soil compositions
- A neighbor’s home might be built on sandy soil (more stable), while yours is built on pure clay (more problematic)
- This explains why some Westchester homes experience severe settlement while others on the same street don’t
How Clay Soil Creates Structural Problems:
- Spring thaw — Melting snow and spring rains saturate clay soil, which swells and pushes outward against your foundation
- Summer dry season — Clay shrinks as it dries, creating voids beneath your foundation; this can cause settlement or create gaps
- Foundation stress — Your foundation expands and contracts with the soil, creating cracks and stress on the structure above
- Settlement — Over decades, this cyclical movement causes differential settlement—some parts of your foundation settle more than others
This is why many Westchester homes show diagonal cracks in walls and sticking doors even when there’s no active water intrusion—the soil itself is moving.
Sandy or Rocky Soil Pockets:
Not all of Westchester is clay. Some areas have sandy or rocky soil, which handles moisture and freeze-thaw cycles better. If you’re in one of these areas, you’re somewhat luckier—but you’re not immune to structural problems.
Age of Homes: Pre-1950s Construction Vulnerabilities
A huge percentage of Westchester’s housing stock was built between 1920 and 1960. These homes have specific structural vulnerabilities that modern homes don’t.
Why Older Westchester Homes Are Vulnerable:
Inadequate Foundation Design
- Many pre-1950s homes were built with rubble stone or brick foundations without proper footings
- These foundations were never designed to handle modern loads
- They lack the reinforcement of modern concrete with rebar
- They’re particularly vulnerable to frost heave and settlement
Insufficient Support Systems
- Older homes often lack adequate support posts or piers in basements
- Long spans of floor joists without mid-span support sag under their own weight
- Roof trusses are sometimes inadequately braced
- Wood framing is often undersized compared to modern standards
Wood Quality and Deterioration
- Growth-ring spacing in older wood was different; old-growth timber is actually stronger than modern wood
- However, decades of exposure to moisture, pests, and temperature cycles have compromised much of this wood
- Many older Westchester homes have rotted sill beams, rim joists, and floor joists—the critical connection points between foundation and house
No Modern Building Codes
- Homes built before the 1950s predate modern building code development
- They weren’t designed with freeze-thaw cycles in mind (code standards for concrete and masonry have improved significantly)
- Snow load requirements have increased substantially since these homes were built
- Seismic or soil-movement standards didn’t exist then
Result: A 70-year-old Westchester home is operating on a structural design that never anticipated the stresses modern winters and soil conditions place on it.
The 1920s-1950s Home Problem in Westchester:
If your Westchester home was built in this era—and many were—understand that structural problems in your home aren’t necessarily signs of poor construction. They’re signs of aging. Your home has likely been dealing with freeze-thaw cycles, soil movement, and heavy snow loads for decades, and that accumulation of stress manifests as cracks, settlement, and deterioration.
This is why older homes often need structural repairs more urgently than newer construction.
The Perfect Storm: How These Factors Combine
Here’s where it gets important: these four factors—freeze-thaw cycles, heavy snow loads, clay soil, and older construction—don’t operate in isolation. They compound each other.
Scenario: A 60-Year-Old Westchester Home on Clay Soil
- Spring thaw: Clay soil saturates and swells, pushing against the foundation and causing it to shift upward
- Foundation cracks develop from the movement
- Water enters those cracks
- Winter arrives: Water in the cracks freezes, expanding and widening the cracks further
- Heavy snowfalls: The roof sagging under load creates stress that travels down through the walls
- Summer: Clay soil dries and shrinks; the foundation settles back down, but the damage from the upward heave remains
- Next spring: The cycle repeats, each year making the damage worse
Over 60 years, this cycle creates the typical structural issues we see in older Westchester homes: foundation cracks, bowing walls, sagging floors, settlement gaps, and cracked plaster.
Why Professional Assessment Is Critical
Because of these unique regional factors, structural problems in Westchester can’t always be solved with a simple fix. A structural engineer familiar with Westchester conditions will understand:
- Why is your home cracking in specific ways
- How does your soil composition affect the best repair approach
- What freeze-thaw considerations must be factored into repairs
- Whether your foundation needs reinforcement beyond simple crack repair
- Whether your roof can safely handle another winter
An engineer unfamiliar with Westchester might recommend standard repairs that won’t hold up to our specific climate and soil conditions.
What This Means for Your Home
If you own a pre-1950s Westchester home on clay soil—which describes thousands of homes in our county—you’re dealing with a property that’s under constant structural stress from factors completely outside your control. This doesn’t mean your home will fail, but it does mean:
- Regular inspections are essential — You need to catch problems early before freeze-thaw and soil movement make them worse
- Maintenance is critical — Drainage, gutters, roof condition, and foundation sealing aren’t luxuries; they’re structural necessities
- Professional repair is important — DIY patches won’t solve climate-induced structural problems; professional repairs account for Westchester’s unique conditions
The good news? Understanding these factors helps you understand why your home needs what it needs. And knowing what to look for—those interior and exterior warning signs from earlier sections—allows you to catch problems while they’re still manageable.

When to Get a Professional Assessment: Identifying Red Flags and Finding the Right Expert
Now that you understand the warning signs of structural problems and the unique factors that make Westchester homes vulnerable, you’re probably wondering: “Do I need to call someone?” The answer depends on what you’ve found—and how serious it is. This section will help you determine whether you need immediate professional assessment, what type of professional to call, and what to expect during the process.
Red Flags Requiring Immediate Inspection
Some structural issues can wait a few weeks for a scheduled appointment. Others demand urgent attention. If you notice any of the following in your Westchester home, don’t delay—call a structural engineer or your contractor immediately.
Emergency-Level Red Flags:
- Visible foundation cracks wider than 1/2 inch — Especially horizontal cracks or those that are actively growing
- Sagging roof or ceiling — Particularly if the sag is visible from inside your home or accompanied by cracking
- Bowing basement or foundation walls that are actively pushing inward — If you can see visible movement or the bowing is severe (more than 1-2 inches), this needs immediate attention
- Floors that feel soft, bouncy, or unstable — Especially if accompanied by visible sagging
- Large gaps between your foundation and house — Where you can insert a quarter or larger coin
- Chimney that’s visibly leaning or separated from the house — Particularly if the separation is 1/4 inch or larger
- Water actively pouring into your basement or crawlspace — Especially if structural damage is visible (like rotting beams or crumbling concrete)
- Visible rot or severe deterioration in support beams — If the wood is soft to the touch or crumbling
- Doors and windows that suddenly won’t close throughout multiple rooms, especially if this is a recent development
- Sounds of creaking, cracking, or settling coming from walls, ceilings, or the attic during temperature changes — This can indicate active structural movement
Why These Are Urgent: These signs indicate active structural failure or conditions where collapse is a real possibility. A sagging roof can collapse under Westchester’s next heavy snowfall. A severely bowed wall can fail suddenly. A rotted beam can give way without warning. These situations pose safety risks to your family.
Call within 24 hours if you notice any of these conditions.
Structural Problems Requiring Prompt Assessment (Within 1-2 Weeks)
These warning signs are serious and warrant professional evaluation, but they’re less immediately dangerous. Still, don’t ignore them.
- Horizontal or diagonal cracks in foundation walls that are less than 1/4 inch wide but visible and stable
- Water seepage or dampness in the basement with visible efflorescence
- Mold or mildew growth in the basement or crawlspace
- Noticeable sag in the floors that’s been there for months without worsening
- Doors and windows sticking in multiple areas of the home (not just one)
- Small rust stains or corrosion on basement support beams
- Deteriorating chimney mortar or spalling bricks (especially on a chimney that’s been that way for years)
- Moderate water stains or soft areas on basement walls or floors
Why These Matter: While not immediate emergencies, these conditions are progressing. In Westchester’s climate, problems that seem stable today can worsen significantly over one winter season due to freeze-thaw cycles. Professional assessment can now prevent emergencies later.
Schedule inspection within 1-2 weeks.
Situations Warranting a Professional Opinion (Within 1-2 Months)
These are maintenance-level concerns or situations where you’re unsure whether professional help is needed. Get them evaluated relatively soon, but they’re not urgent.
- Minor cracks in drywall that aren’t growing, but you want them verified
- Very slight floor unevenness that you noticed but isn’t obvious to visitors
- Aging roof that isn’t actively leaking but is nearing the end of its expected lifespan (20-25 years for asphalt shingles)
- Basement walls with old efflorescence or water stains that seem to have stabilized
- A general concern about an older home’s structural health before buying it (pre-purchase inspection)
- Previous structural repairs from years ago that you want assessed to confirm they held up
Why These Warrant Attention: These situations benefit from professional guidance before they become emergencies. Getting a professional opinion gives you peace of mind and helps with planning and budgeting.
Schedule inspection within 4-8 weeks.
Types of Professionals: Choosing the Right Expert
Not all home professionals are qualified to assess structural problems. Here’s who to call for different situations.
Structural Engineers: The Gold Standard for Serious Issues
A licensed structural engineer (PE or Professional Engineer) is the expert for serious structural concerns. They:
- Understand load-bearing systems, building codes, and structural failure modes
- Can assess whether damage is cosmetic or structural
- Understand freeze-thaw damage and Westchester-specific structural issues
- Can design repairs and provide engineer-stamped plans that contractors can follow
- Are qualified to testify in legal disputes about structural damage
- Carry professional liability insurance
What Structural Engineers Cost: $500-$2,000+ for a residential inspection, depending on home size and complexity. Expect to pay more if the engineer needs to return for follow-ups or soil testing.
When to Call a Structural Engineer:
- Any of the emergency-level red flags above
- Multiple warning signs across different areas of your home
- Serious foundation issues
- Sagging roof or floors
- You’re considering major repairs and need an engineer-designed solution
- You’re buying a Westchester home and want a structural assessment
Home Inspectors: Good for Pre-Purchase Evaluations
A certified home inspector (ASHI or similar certification) can:
- Provide a comprehensive overview of your home’s condition
- Identify obvious structural issues
- Flag areas that need further professional evaluation
- Offer a general sense of whether your home has structural concerns
What Home Inspectors Cost: $300-$800 for a full home inspection, often more for larger homes.
When to Call a Home Inspector:
- You’re buying a Westchester home and want a general condition assessment
- You want a baseline inspection of an older home
- You’re unsure whether you need a structural engineer and want a professional opinion first
Important Note: Home inspectors are generalists. They’re not structural engineers. If their inspection reveals potential structural issues, you’ll want to follow up with a structural engineer for a detailed assessment.
General Contractors: Experience, Not Expertise
An experienced general contractor who specializes in restoration or foundation work can:
- Provide a practical estimate for repairs
- Understand Westchester-specific construction challenges
- Coordinate repairs once issues are identified
What Contractors Cost: Free estimates (though some may charge $100-$300 for detailed assessments)
When to Call a Contractor:
- After you’ve had a structural engineer’s assessment and need repair estimates
- You need to coordinate repairs
- You want a practical perspective on how to address an issue
Important Note: Don’t rely on a contractor as your primary assessment source. Contractors have a financial incentive to recommend repairs, even when issues might be minor. Always get a structural engineer’s assessment first.
The Right Sequence:
- You notice signs of structural problems
- Call a structural engineer (if issues are serious) or a home inspector (if evaluating pre-purchase or unsure)
- Engineer/inspector identifies problems and recommends the scope of work
- Call contractors for repair estimates based on the engineer’s recommendations
- Hire a contractor to execute repairs designed by the engineer
What to Expect During a Professional Structural Assessment
Understanding what happens during an assessment helps you prepare and know what to expect.
Before the Appointment:
- Schedule during daylight — The inspector needs good lighting, especially for exterior evaluation
- Clear basement and crawlspace — Remove stored items so inspectors can access walls and framing
- Have documentation ready — Any previous inspection reports, past repairs, or known issues
- Write down your concerns — Give the inspector a list of specific areas you’re worried about
- Plan for 2-4 hours — Structural assessments take time; rushing leads to missed issues
During the Assessment:
The professional will:
Exterior Evaluation:
- Walk around the entire perimeter, looking at the foundation condition
- Check for cracks, bowing, settlement gaps, and water intrusion
- Examine roof condition, gutters, downspouts, and grading
- Check the chimney condition and separation from the house
- Look at siding, trim, and signs of water damage
Interior Evaluation:
- Check the foundation and basement walls from the inside
- Look for water damage, mold, and efflorescence
- Examine support beams, posts, and overall framing
- Check floor levelness with equipment (not just by eye)
- Look for cracks in walls, ceilings, and around windows/doors
- Examine the attic to assess roof framing and any damage
Testing (May Include):
- Foundation crack evaluation — Whether cracks are stable or active
- Floor level measurement — Using a laser level to quantify sagging
- Moisture testing — Determining whether water damage is present
- Soil testing — In some cases, to understand soil composition and bearing capacity
- Structural calculations — To determine if beams or supports are adequate
Documentation:
- Photos of problem areas
- Detailed notes and measurements
- Sketches or diagrams showing issues
- Written recommendations
After the Assessment: The Report
You’ll receive a written report that:
- Document all observed conditions and measurements
- Categorizes issues by severity (immediate concern, monitor, general maintenance)
- Explains what’s wrong and why it matters
- Recommends next steps and repairs
- May include engineer-designed repair plans (if from a structural engineer)
- Estimates scope of work (contractors will use this to provide cost estimates)
Understanding the Report:
- “Structural” vs. “Cosmetic” — Learn to recognize what’s actually structural and what’s just aesthetics
- “Monitor” items — These don’t need immediate repair but should be checked regularly
- “Repair” items — These need professional correction; don’t try DIY fixes
- Repair urgency — The report will clarify which repairs are urgent and which can wait
Cost of Professional Assessment vs. Cost of Ignoring Problems
This is the practical question every homeowner asks: Is it worth $500-$2,000 for an inspection?
The Math on Delayed Repairs:
- Foundation crack ignored for 5 years in Westchester’s freeze-thaw cycles: $2,000 crack repair becomes $15,000-$25,000 foundation stabilization or underpinning
- Sagging floor ignored for 3 years: Early intervention (sistering beams, posts) costs $8,000-$15,000. Waiting until wood becomes severely rotted: $20,000-$40,000 complete system replacement
- Water intrusion ignored for 2 years: Initial waterproofing $3,000-$5,000. After structural damage: $10,000-$30,000+ in frame repair, mold remediation, and waterproofing
- Roof damage ignored through one winter: Repair costs $1,000-$2,000. After water damage cascades: $15,000-$50,000 in structural repair
The inspection cost is typically 1-3% of eventual repair costs. Getting assessed now prevents the 300% cost inflation that happens when problems compound over years.
Additional Benefits of Professional Assessment:
- Home sale value — A clean structural assessment increases buyer confidence and property value; problems discovered during the sale often result in 10-15% price reductions
- Insurance — Some insurance companies require recent structural assessments; having documentation helps with claims
- Peace of mind — Knowing your home’s actual condition eliminates stress and uncertainty
- Prioritization — A professional assessment helps you prioritize which repairs to tackle first
Questions to Ask When Interviewing Professionals
Before hiring, ask:
Experience & Credentials:
- “Are you a licensed structural engineer (PE) or certified home inspector (ASHI)?”
- “How many years have you been working in the Westchester area?”
- “What’s your experience with older homes and freeze-thaw damage?”
Scope & Process:
- “What will your inspection include? Will you go into the crawlspace/attic?”
- “Do you have references from other Westchester homeowners?”
- “What’s your timeline for providing the report?”
- “Will you be available for follow-up questions after the report?”
Understanding Their Assessment:
- “Can you explain your findings in terms I can understand?” (Avoid hiring someone who’s condescending or overly technical)
- “What’s your recommendation: immediate repair, monitor, or can we wait?”
- “Are there temporary measures I should take to prevent worsening?”
Cost & Liability:
- “What’s your fee structure?”
- “Do you carry professional liability insurance?”
- “Can you provide an itemized estimate?”
Taking the Next Step
If you’ve read this far and recognized several warning signs in your Westchester home, the next step is clear: Schedule a professional assessment. Don’t wait for problems to worsen. In Westchester’s climate, what’s a manageable repair this year becomes a major undertaking in three to five years.
The professionals you hire will provide clarity on the structural problems your home actually has, what structural repairs entail, and what you can realistically expect to spend. That clarity is worth the assessment cost many times over.

Common Structural Solutions: How Your Westchester Home Gets Fixed
Once a structural engineer has identified structural problems in your Westchester home, the next question is: “How do we fix it?” The answer depends entirely on what’s wrong. Different structural issues require different solutions—and what works for a foundation crack won’t work for a sagging floor. This section walks you through the most common structural repairs Westchester homeowners face and what’s involved in each.
Foundation Repairs: Solutions for the Most Common Structural Issues
Foundation problems are among the most frequent structural issues in Westchester homes, and fortunately, there are proven repair methods.
Crack Injection: For Growing or Leaking Cracks
Crack injection—also called epoxy injection or polyurethane injection—is often the first-line repair for foundation cracks that are:
- Actively leaking water
- Growing wider over time
- Threatening to worsen with future freeze-thaw cycles
How It Works:
A contractor drills small holes along the length of the crack, inserts injection ports, then pumps either epoxy or polyurethane material into the crack under pressure. This material:
- Fills the void created by the crack
- Bonds the concrete on either side back together
- Creates a waterproof seal, preventing future water intrusion
- Is flexible enough to accommodate seasonal concrete movement (important in Westchester’s freeze-thaw climate)
Why Different Materials Matter in Westchester:
- Epoxy — Very strong bond, excellent for structural cracks where you need maximum strength. Less flexible, so it can re-crack if foundation movement continues.
- Polyurethane — More flexible, accommodating seasonal movement better. Slightly less strong but ideal for Westchester, where freeze-thaw cycles cause ongoing stress.
Many Westchester contractors recommend polyurethane for freeze-thaw-damaged cracks because epoxy can re-crack with the next winter’s expansion and contraction.
Cost: $500-$2,000+ depending on crack length and depth
Timeline: 1-3 days
Basement Wall Anchors or Carbon Fiber Straps: For Bowing Walls
If your basement wall is bowing inward—a common problem in Westchester due to soil pressure and hydrostatic pressure from groundwater—injection alone won’t fix it. You need to stabilize the wall from the inside.
Wall Anchors (Helical or Screw Anchors):
These are anchors installed horizontally through the bowing wall that extend into the soil beyond the wall. They:
- Tie the wall back to stable soil
- Prevent further inward movement
- Can slightly straighten the wall if installed with adjustable anchors
- Are installed from inside, so no exterior excavation is needed
Carbon Fiber Straps:
For less severe bowing, carbon fiber reinforcement straps can be applied to the interior wall surface. They:
- Add structural strength to the wall
- Prevent further bowing
- Are less invasive than anchors (no drilling through the wall)
- Are more aesthetically acceptable if you’re finishing your basement
Cost for Anchors: $150-$400 per anchor; most bowing walls need 4-6 anchors, so $600-$2,400+
Cost for Carbon Fiber: $1,500-$3,500 for a typical basement wall
Timeline: 3-7 days
Important Note: Wall anchors don’t fix the underlying cause—they stabilize the problem. You’ll likely also need to address exterior drainage (see waterproofing below) to prevent water from continuing to push on the wall.
Foundation Waterproofing: Addressing the Root Cause
Many foundation problems are caused or worsened by water intrusion. Waterproofing from the exterior addresses the source.
Exterior Foundation Waterproofing:
This involves:
- Excavation — Digging around the foundation to expose the exterior wall
- Cleaning — Removing soil and deteriorated concrete from the wall surface
- Repair — Fixing any cracks or deterioration in the foundation
- Waterproof coating — Applying membrane or coating to the exterior foundation surface
- Drainage installation — Installing a perimeter drain system to collect water and direct it away from the foundation
- Backfill — Replacing soil with proper grading to slope away from the house
Why This Matters in Westchester:
In our region’s clay-heavy soil, water accumulates around foundations. Waterproofing prevents this water from:
- Creating hydrostatic pressure that bows basement walls
- Infiltrating through cracks and causing interior water damage
- Freezing in foundation voids and causing freeze-thaw damage
- Saturating soil that then heaves and settles, moving your foundation
Interior Waterproofing (When Exterior Isn’t Practical):
Sometimes exterior waterproofing isn’t feasible (finished basement, tight property boundaries, etc.). Interior solutions include:
- Interior drainage systems — Collecting water at the basement floor/wall junction and pumping it out
- Interior sump pumps — Removing water that does enter
- Interior wall membranes — Preventing water from wicking through walls
Interior solutions don’t address the source but prevent water from causing interior damage.
Cost for Exterior Waterproofing: $3,000-$8,000+ depending on foundation perimeter and excavation complexity
Cost for Interior Solutions: $2,000-$5,000
Timeline: Exterior: 5-10 days (weather-dependent). Interior: 2-5 days
Structural Reinforcement: Adding Support Where It’s Failing
Some structural repairs involve adding support to areas that are failing under load.
Sistering Beams: Reinforcing Sagging Floor Joists
When floor joists sag because they’re rotted, undersized, or simply aged, sistering is often the solution.
How Sistering Works:
A new beam (or sister beam) is installed directly against the existing beam, creating a composite beam that:
- Distributes the load between the old and the new beam
- Adds structural capacity without replacing the entire old beam
- Prevents further sagging if done before the old beam fails completely
The Process:
- Support the sagging area — Temporary posts are installed to support the floor above
- Sister installation — The new beam is fitted tight against the existing beam using shims if necessary
- Fastening — The beams are bolted together with structural bolts every 12-16 inches
- Hydraulic jacking — The floor is sometimes carefully jacked up to reduce the sag before fastening (though this is done carefully to avoid cracking walls or floors)
- Temporary support removal — Once the sister is secure, temporary supports are removed
Why This Is Better Than Replacement:
Replacing a floor joist is more invasive—it requires removing the old beam entirely, which means temporarily removing all support. Sistering adds support while keeping the old beam in place.
Cost: $2,500-$6,000+ per joist or beam area, depending on length and extent of sister required
Timeline: 3-7 days
Support Posts and Piers: Creating Load Paths
Older Westchester basements often lack adequate support. A basement might have long spans of floor joists with no mid-span support, causing excessive deflection (sagging).
Solution: Additional Support Posts
New posts (or piers) are installed:
- Vertically from the basement floor to the beam above
- On adequate footings that extend below the frost line (important in Westchester; frost penetration is typically 3-4 feet deep)
- Spaced to reduce the span of the beam above
Why Footings Matter:
In Westchester, you can’t just place a post on basement concrete. It needs a footing extending below the frost line. If a post’s footing isn’t deep enough, frost heave will push it up in winter, destabilizing your floor. This is a freeze-thaw-specific consideration for Westchester repairs.
Adjustable posts allow fine-tuning:
- After installation, the post can be slowly adjusted with a screw jack
- This allows gradual correction of sagging floors without sudden movement that could crack walls
- Adjustments are made over weeks or months, not all at once
Cost: $800-$2,000+ per post, including footing
Timeline: 2-5 days per post
Support Walls: Distributing Load Vertically
For severe sagging or inadequate support, the solution might be installing a new support wall in the basement or attic, creating a load path from the roof to the foundation.
How It Works:
A new wall is constructed directly under the sagging beam or along an area needing support. This wall:
- Rests on a foundation footing designed for Westchester’s frost depth requirements
- Carries the load down through the floor system
- Reduces the span of beams above, preventing sagging
- Is often temporary during renovation, but can become permanent if needed
Cost: $3,000-$10,000+ depending on wall length and complexity
Timeline: 5-10 days
Specialized Repairs: Solutions for Specific Problems
Some structural problems require specialized approaches.
Foundation Underpinning: For Severe Settlement
When a foundation has settled unevenly—causing large gaps between the foundation and the house—the foundation itself needs to be stabilized or re-leveled.
Underpinning Process:
- Assessment — Soil testing determines bearing capacity and why settlement occurred
- Plan — The engineer designs the underpinning system
- Installation — New piers are driven deep into stable soil beneath the foundation
- Jacking — The foundation is carefully jacked up and supported on the new piers
- Completion — Structural connections are made between the foundation and the new supports
Why This Is Serious:
Underpinning is one of the most invasive and expensive structural repairs. It involves lifting your house and placing new supports beneath the foundation. It’s typically done only when:
- Settlement is severe (gaps wider than 1/2 inch)
- Multiple areas of the foundation have settled differently
- The foundation is failing and needs complete re-support
Cost: $20,000-$100,000+ depending on extent (this is why early detection matters—preventing severe settlement is far cheaper than underpinning)
Timeline: 2-4 weeks
Chimney Bracing or Rebuilding
A leaning or separated chimney requires stabilization.
For Minor Lean or Separation:
- Bracing — Metal braces are installed to tie the chimney to the house structure, preventing further separation
- Repointing — Deteriorated mortar is removed and replaced with new mortar (ideally lime mortar, which is more flexible for Westchester’s freeze-thaw cycles)
- Flashing repair — The connection between the chimney and the roof is resealed
Cost for Bracing/Repointing: $1,500-$4,000
For Severe Lean or Deterioration:
- Partial rebuild — The chimney is taken down to a stable point and rebuilt
- Complete rebuild — The entire chimney is removed and rebuilt from the foundation up
- Removal — If the chimney isn’t needed, it’s removed entirely (if it’s just ornamental and your home has another heating system)
Cost for Partial Rebuild: $3,000-$6,000
Cost for Complete Rebuild: $5,000-$15,000+
Timeline: Bracing/repointing: 3-7 days. Rebuild: 1-3 weeks
Why Material Choice Matters in Westchester:
Modern Portland cement mortar is hard and inflexible. In Westchester’s freeze-thaw climate, this causes it to fail faster because it can’t accommodate the seasonal expansion and contraction of bricks and masonry. Traditional lime mortar is softer and more flexible, making it better for older Westchester chimneys. An experienced contractor will understand this distinction.
Settlement Stabilization: Preventing Future Movement
Sometimes the goal isn’t to fix past settlement but to prevent future settlement from occurring.
Solutions include:
- Improved drainage — Preventing soil from becoming saturated, which causes settlement in clay soils
- Proper grading — Ensuring water slopes away from the foundation
- Soil stabilization — In some cases, soil is chemically stabilized to prevent future shrinking and swelling
- Foundation reinforcement — Adding strength to areas prone to settlement
Cost: $2,000-$8,000 depending on scope
Timeline: Varies by solution; drainage improvements: 3-7 days
Choosing the Right Solution: It’s Not One-Size-Fits-All
Here’s the crucial point: the solution that works depends entirely on the problem and its cause. A bowing basement wall requires wall anchors plus waterproofing, not just epoxy crack injection. A sagging floor caused by rotted joists needs sistering or replacement, not just a support post.
This is why professional assessment is so important. A structural engineer will:
- Identify the root cause of the problem
- Recommend the appropriate solution
- Design the repair if necessary
- Provide specifications contractors can follow
Attempting repairs without understanding the cause often results in failed repairs that need to be redone—a costly mistake.
Timeline and Cost Summary
Here’s a quick reference for common Westchester structural repairs:
Problem | Solution | Cost Range | Timeline |
Foundation crack (stable) | Crack injection | $500-$2,000 | 1-3 days |
Bowing basement wall | Wall anchors | $600-$2,400+ | 3-7 days |
Water infiltration | Exterior waterproofing | $3,000-$8,000+ | 5-10 days |
Sagging floor | Sistering beams | $2,500-$6,000+ | 3-7 days |
Inadequate support | Posts/piers | $800-$2,000+ per post | 2-5 days per post |
Severe settlement | Underpinning | $20,000-$100,000+ | 2-4 weeks |
Deteriorated chimney | Repointing/bracing | $1,500-$4,000 | 3-7 days |
Chimney rebuild | Full rebuild | $5,000-$15,000+ | 1-3 weeks |
Remember: These are ranges. Your actual costs depend on the extent of damage, your home’s specific conditions, and Westchester labor rates.
What Happens After Repairs: Ongoing Maintenance
Once structural repairs have been completed, your job isn’t finished. Preventing future structural problems requires ongoing attention to:
- Drainage — Keep gutters clean, extend downspouts 4-6 feet from the foundation
- Grading — Maintain proper slope away from your home
- Basement dryness — Monitor for any water intrusion; address immediately
- Regular inspection — Have your foundation inspected every 2-3 years
- Roof maintenance — Replace aging shingles promptly to prevent water damage
Think of structural repairs like fixing a cavity at the dentist—it stops the immediate problem, but good habits prevent future cavities.

Prevention & Maintenance Tips: How to Avoid Structural Problems in Your Westchester Home
You’ve learned what structural problems look like, why Westchester homes are vulnerable to them, and how expensive the fixes can be. So here’s the most important question: How do you prevent them in the first place? The good news is that many structural issues are preventable. By implementing a maintenance routine and addressing problems early, you can avoid the costly structural repairs that plague many Westchester homeowners.
This section covers practical, actionable steps you can take to protect your home’s structural integrity.
Regular Inspections: Catching Problems Before They Become Emergencies
The most cost-effective structural maintenance step is regular professional inspection. Catching problems early prevents small issues from becoming major failures.
How Often Should You Inspect Your Westchester Home?
Baseline Recommendations:
- Every 2-3 years — Annual or biennial inspections for homes over 50 years old (which includes most Westchester homes)
- Every 3-5 years — For newer homes (built after 1990) or homes with no known structural issues
- Annually — After you’ve had structural repairs done (to verify repairs are holding up)
- Seasonally — At a minimum, inspect after winter (to catch freeze-thaw damage) and after heavy rain (to check for water intrusion)
Why More Frequent Inspections in Westchester?
Westchester’s climate accelerates structural deterioration. The freeze-thaw cycles, heavy snow loads, and clay-based soil mean that problems develop faster here than in milder climates. An annual inspection allows you to catch problems that developed over the winter—before they compound with the next winter’s freeze-thaw cycles.
What to Inspect Yourself (Between Professional Inspections):
You don’t need to be an engineer to do a basic visual check. Monthly or quarterly, look for:
- New cracks in basement walls or foundation
- Water stains or efflorescence on basement walls
- Mold or mildew growth in the basement or crawlspace
- Soft or spongy areas on wooden beams or sill plates
- Gaps between the foundation and the house, or the chimney and the house
- Roof condition — Missing shingles, visible damage, or sagging
- Gutter cleanliness and proper drainage
- Doors and windows sticking or misaligned
- Floor unevenness or softness
Document what you see with photos and notes. When you hire a professional for the formal inspection, share these observations—they help the professional prioritize their assessment.
Proper Drainage and Grading: Your First Line of Defense
The single most important factor in preventing structural problems in Westchester is controlling water. Water causes foundation damage, soil movement, freeze-thaw damage, and wood rot. Proper drainage and grading keep water away from your home’s structure.
Understanding Your Home’s Grading
Grading is the slope of the ground around your home. Proper grading slopes away from your foundation at a minimum of 1/8 inch per foot for at least the first 10 feet from your house.
Why This Matters in Westchester:
With our clay-heavy soil, water that accumulates near your foundation:
- Saturates the clay, causing it to swell and expand
- Creates hydrostatic pressure against your foundation walls
- In winter, this water freezes in foundation voids, expanding and cracking concrete
- Stays in contact with your wood sill beam and foundation, promoting rot
Checking Your Grading:
Walk around your home after a rain. Look for:
- Puddles near the foundation indicate improper grading
- Water running toward your house tells you the slope is wrong
- Water flowing away from the house — Good; this is what you want
- Sunken areas near the foundation may have settled over time, reversing the proper slope
If you find problem areas, you likely need grading correction.
Correcting Grading:
Simple fixes (DIY-possible):
- Remove plants or mulch touching the foundation—they trap moisture
- Add soil near the foundation to create a proper slope
- Remove debris or leaves that dam water flow
- Plant bushes or trees at least 3-5 feet from the foundation
More significant fixes (professional needed):
- Major grading adjustment requiring significant soil movement
- Adding drainage swales (shallow ditches) to redirect water
- Installing French drains if grading alone won’t solve the problem
- Removing tree roots that have disrupted the grading
Cost for Grading Correction: $500-$2,000+ depending on extent
Timeline: 1-3 days
French Drains: When Simple Grading Isn’t Enough
A French drain is a perforated pipe buried in gravel beneath the soil surface. It collects water and directs it away from your foundation.
Why Use a French Drain in Westchester:
In areas with poor natural drainage or clay soil that doesn’t drain well, a French drain:
- Collects groundwater before it reaches your foundation
- Directs water to a safe discharge point (street storm drain, dry well, or daylight outlet)
- Prevents water from pooling around your foundation
- Reduces hydrostatic pressure against basement walls
Installation:
- A trench is dug around the foundation perimeter (or problem area)
- A perforated drainage pipe is laid in the trench
- The pipe is surrounded by gravel and filter fabric
- The trench is backfilled with soil
- The drain is connected to a discharge point
Cost: $2,000-$8,000+ depending on foundation perimeter and discharge location
Timeline: 5-10 days
Sump Pumps: Managing Water That Infiltrates
Even with good drainage and grading, water sometimes enters basements—especially after heavy rain or spring thaw in Westchester. A sump pump handles this water.
How Sump Pumps Work:
- A sump pit is installed in the lowest part of the basement
- A pump automatically activates when the water level rises
- Water is pumped out and discharged away from the foundation
- Most modern systems include battery backup (important for power outages during storms)
Why Battery Backup Matters:
Heavy rain often accompanies power outages. Without battery backup, your sump pump won’t run when you need it most. Westchester storms can dump 2-3+ inches of rain in an hour—your pump needs to run regardless of power availability.
Cost: $1,200-$3,000 for system installation with battery backup
Timeline: 1-2 days
Gutter Maintenance: Keeping Water Away From Your Foundation
Your gutters are literally gutters—they’re supposed to channel water away. When they’re clogged, water overflows and falls directly onto the ground next to your foundation.
The Gutter-Foundation Connection:
Water overflowing from gutters:
- Falls directly on soil adjacent to the foundation
- Percolates down toward basement walls
- Saturates clay soil, causing expansion and settlement
- Creates the perfect conditions for the freeze-thaw damage cycle
- Causes water intrusion into basements
You might have perfect grading and French drains, but clogged gutters can undo all that protection.
Gutter Maintenance Schedule for Westchester Homeowners:
Minimum (Spring and Fall):
- Clean gutters in late spring (after trees stop shedding)
- Clean gutters in fall (after leaves finish falling)
- Check that water is flowing freely and discharging away from the foundation
Better (Quarterly):
- Clean gutters in spring, early summer, fall, and late fall
- This prevents the accumulation of leaves, pine needles, and debris
Why More Often in Westchester:
- Leaves fall over an extended period (September through November)
- Pine trees shed year-round
- Heavy spring rains mean gutters need to be clear before water volume increases
- Early winter precipitation (rain vs. snow) needs clear gutters to drain properly
What to Check During Gutter Maintenance:
- Debris removal — Remove all leaves, twigs, pine needles, and granules from the roof
- Sagging sections — Gutters should be level; sagging areas collect water
- Separation — Gutters should be firmly attached; loose gutters can’t drain properly
- Downspout discharge — Water should flow away from the foundation; check that it’s not blocked
- Gutter pitch — Water should flow toward downspouts; standing water breeds mosquitoes and promotes rot
Professional Gutter Cleaning:
If climbing ladders makes you uncomfortable or your roof is steep, hire professionals. They’ll also identify problems (sagging, leaks, damage) that need repair.
Cost for Professional Gutter Cleaning: $150-$400 depending on home size and debris volume
Gutter Protection Systems:
Gutter guards or screens reduce maintenance by preventing leaves from entering gutters. They’re useful for homes surrounded by large trees.
Cost: $1,000-$3,000 for installation on a typical home
Downspout Extensions: Discharge Water Far Enough
Gutters should discharge water at least 4-6 feet away from your foundation. If downspouts are discharging right at the foundation or into a splash block that sends water back toward the house, you’re not protecting your foundation.
Solutions:
- Extend downspouts — Add extensions that carry water 4-6 feet from the house
- Underground drainage — Bury downspout extensions with perforated pipe that drains away from the foundation
- Daylight outlets — Direct downspouts to yard areas where water can drain naturally without pooling
Cost: Downspout extensions DIY ($20-50) or professional ($100-300). Underground: $500-$1,500
Basement Waterproofing: Interior Preventive Measures
While exterior waterproofing is the best long-term solution, there are preventive interior measures you can take.
Keep Your Basement Dry:
- Monitor for dampness — After rain or spring thaw, check for any seepage or dampness
- Use a dehumidifier — Basement humidity promotes mold and wood rot; keeping humidity below 60% helps prevent deterioration
- Ensure sump pump operation — Test monthly that it activates and discharges properly
- Maintain interior drainage — If you have an interior drain system, keep it free of debris
Identify Water Entry Points:
If you notice water entering your basement, mark the location and note conditions when it occurs:
- Does it happen during rain? → Likely surface water infiltration (grading or gutter issue)
- Does it happen during thaw or high groundwater? → Likely foundation seepage (hydrostatic pressure)
- Is it constant? → Likely groundwater (requires drainage solutions)
This information helps a professional diagnose and fix the problem.
Seal Foundation Cracks (Temporary Measure):
Small, hairline cracks can be temporarily sealed from the inside using:
- Concrete crack sealant — Available at hardware stores; fills surface cracks
- Hydraulic cement — Specifically designed for foundation cracks- expands as it cures to fill gaps
Important caveat: These are temporary measures. They don’t address the underlying cause. If you keep having to reseal the same crack, professional injection or waterproofing is needed.
Cost for DIY sealing: $20-$100 per product
Avoid Finished Basement Problems:
If you have a finished basement, be especially vigilant:
- Water damage to finished spaces is expensive to repair
- Mold in finished basements poses health risks
- Carpet and drywall absorb water quickly, promoting mold growth
- Consider moisture-resistant materials (tile, concrete, vinyl) in basement finishes
Proper Ventilation:
Ensure your basement has adequate ventilation:
- Operable windows (if below grade) for air circulation
- Bath fan venting — If you have a basement bathroom, ensure the fan vents outside (not into the basement)
- Crawlspace venting — Crawlspaces should have adequate vents to allow air circulation and prevent moisture accumulation
Roof Maintenance: Preventing Water Intrusion Before It Starts
Water entering through a failing roof eventually becomes a structural problem. Catching roof issues early prevents cascading structural damage.
Roof Inspection Schedule:
After Winter: Inspect for ice dam damage, missing shingles, and freeze-thaw damage
After Spring Storm: Heavy rain and wind cause damage; look for loose or missing shingles
Before Winter: Ensure the roof is in good condition before the heavy snow season
Annual Inspection: A professional should inspect your roof every 1-2 years, especially if it’s over 15 years old
What to Look For:
From the ground (or safely from your ladder):
- Missing or loose shingles — Replace promptly; exposed roof decking deteriorates quickly
- Curling or buckling shingles — Sign of age; consider roof replacement if widespread
- Bare spots on shingles (where granules have eroded) indicate age and approaching failure
- Sagging roofline — Visible sag indicates structural problems underneath (see Section 3)
- Algae or moss growth — Indicates moisture issues and can accelerate deterioration
- Flashing deterioration — Metal flashing around chimneys, vents, and valleys is critical for water management
Roof Lifespan in Westchester:
- Asphalt shingles — 15-25 years (Westchester’s freeze-thaw cycles shorten lifespan vs. milder climates)
- Metal roofing — 40-60 years
- Slate or tile — 50+ years (excellent for Westchester’s climate but expensive)
- Wood shakes — 20-40 years (beautiful but prone to freeze-thaw damage in Westchester)
If your roof is nearing the end of its expected lifespan, start budgeting for replacement.
Cost for Roof Replacement: $8,000-$25,000+ depending on size and material (asphalt shingles are on the lower end; premium materials are higher)
Preventive Maintenance:
- Remove debris from roof (leaves, branches, moss/algae)
- Clear gutters frequently (prevents water backup under shingles)
- Remove snow after heavy storms (prevents ice dams and reduces load stress)
- Trim tree branches overhanging the roof (prevents debris accumulation and damage)
Chimney and Masonry Maintenance: Preventing Deterioration
Your chimney is exposed to the weather constantly. Regular maintenance prevents deterioration and expensive rebuilds.
Annual Chimney Inspection:
Have your chimney professionally swept and inspected every 1-2 years. Inspection should include:
- Flue condition — Any cracks or deterioration inside
- Mortar condition — Joints should be solid; mortar that’s crumbling or missing needs repointing
- Brick or stone condition — Look for spalling, deterioration, or displacement
- Flashing condition — Where the chimney meets the roof; flashing prevents water intrusion
- Chimney cap — Should be present and intact; missing caps allow water and animals into the flue
Cost for Professional Chimney Inspection: $100-$300
Repointing: The Preventive Measure for Mortar Deterioration
In Westchester’s freeze-thaw climate, mortar deteriorates relatively quickly. Repointing—removing deteriorated mortar and replacing it with fresh mortar—prevents bigger problems.
Why It Matters:
- Deteriorated mortar allows water to infiltrate behind bricks
- Water freezes and thaws, expanding and contracting bricks
- Eventually, this leads to spalling (pieces of brick breaking off) or structural failure
- Catching and repointing early is much cheaper than brick replacement
Cost for Chimney Repointing: $1,500-$4,000 for a typical chimney (depends on the extent of deterioration)
Timeline: 3-7 days
Flashing Repair or Replacement:
Flashing is metal (usually lead, copper, or galvanized steel) that seals the connection between the chimney and the roof. When flashing fails, water runs down inside the chimney into your attic and walls.
Signs of Flashing Failure:
- Water stains on the ceiling near the chimney
- Mold or water damage in the attic near the chimney
- Water dripping inside the fireplace during rain
Cost for Flashing Repair/Replacement: $500-$1,500
Timeline: 1-2 days
Wood Framing Maintenance: Checking for Rot and Insect Damage
Wooden structural elements need periodic inspection for rot and pest damage.
What to Inspect:
- Sill beams (where the house sits on the foundation)
- Floor joists in basement and crawlspace
- Support posts in the basement
- Roof framing in attic (visible from below)
- Rim joists at the perimeter of the house
Signs of Deterioration:
- Soft or spongy wood — When you probe with a screwdriver, it yields or punctures easily
- Musty or moldy smell — Indicates moisture and decay
- Visible rot — Dark discoloration, sometimes with white stringy fungal growth
- Insect damage — Small holes, galleries (tunnels), sawdust-like debris, or dead insects
- Visible cracks or splits (especially check annual growth rings)
Preventing Wood Deterioration:
- Keep basements and crawlspaces dry (moisture is the primary culprit)
- Ensure proper ventilation in crawlspaces (prevents moisture accumulation)
- Trim vegetation away from the foundation (allows air circulation, reduces moisture)
- Monitor for insect activity and address promptly if found
- Fix roof and gutter leaks promptly (prevent water from reaching wood framing)
Cost for Professional Wood Inspection: Often included with structural inspection ($0-500 as an add-on)
If Rot or Damage Is Found:
Small areas of rot (less than 10% of the beam) can sometimes be treated and reinforced. Extensive rot requires beam replacement or sistering (see Section 6).
Soil Monitoring: Managing Westchester’s Clay Soil Issues
While you can’t change your soil, you can manage how it affects your home.
Maintain Consistent Moisture Levels:
Clay soil expands when wet and shrinks when dry. Extreme swings in moisture cause severe settlement:
- Water consistently during dry periods — Prevents soil from shrinking and pulling away from the foundation
- Ensure proper drainage — Prevents soil from becoming oversaturated and expanding excessively
- Mulch around foundation — Helps regulate soil moisture by reducing evaporation and runoff
Monitor Foundation During Seasonal Changes:
- Spring thaw — Watch for increased water seepage, bowing walls, or cracks widening as soil swells
- Summer dry season — Monitor for new gaps or settlement as soil shrinks
- Fall and winter — Watch for freeze-thaw damage in exposed concrete and masonry
Document changes with photos and share with your structural engineer at inspection time.
The Maintenance Calendar: Your Year-Round Structural Protection Plan
Here’s a quick reference for what to do when:
Spring (After Winter Damage Assessment):
- Inspect the foundation for winter damage
- Check the chimney for deterioration
- Clear winter debris from gutters and the roof
- Check grading for erosion from snowmelt
- Inspect the basement for water intrusion
- Trim tree branches away from the roof
Summer (Preventive Season):
- Monthly gutter checks (especially if surrounded by trees)
- Monitor the foundation for new cracks or settling
- Check the basement for mold or moisture
- Test sump pump operation
- Monitor the roof condition during clear weather
- Check for pest activity in basement/crawlspace
Fall (Pre-Winter Preparation):
- Heavy gutter cleaning (leaf season)
- Professional roof inspection
- Chimney inspection and sweep
- Check weatherstripping and seals
- Verify gutters and downspouts are clear
- Cut back vegetation from the foundation
Winter (Post-Storm Assessment):
- After heavy snow, inspect the roof for damage and sagging
- After freeze-thaw cycles, check the foundation for new cracks
- Monitor ice dam formation and address (remove snow from the roof if needed)
- Check the basement for water intrusion after thaws
The ROI on Prevention: Cost of Maintenance vs. Cost of Repairs
Here’s the hard reality:
- Annual preventive maintenance (inspections, gutter cleaning, roof checks): $1,000-$2,000/year
- Result of skipping maintenance: $20,000-$100,000+ in structural repairs
5-Year Comparison:
With preventive maintenance:
- Year 1-5: $5,000-$10,000 in maintenance
- If problem found: Repair while small: $2,000-$8,000
- Total: $7,000-$18,000 for a home in good condition
Without preventive maintenance:
- Years 1-5: $0 (deferred)
- At year 5: Catch problems after they’ve compounded: $30,000-$100,000+
- Total: $30,000-$100,000+
The choice is clear. Preventive maintenance pays for itself many times over by preventing the expensive catastrophic failures that plague deferred-maintenance homes.